
How to install Personal Services on a machine running Ubuntu
This article describes the process to set-up a full Personal Services server on a machine Ubuntu. This can also be applied to other flavours of linux.
Before starting this article check you have the following for prerequisites:
- You have a machine with Ubuntu installed
- You can connect to the internet ("ping www.google.com" to check)
- In order to have other machines connect to personal services your machine has a static ip address/hostname on your wifi network. Although the install will work without this
Once you have confirmed you have met the prerequisites and you know the hostname of the machine you can proceed through the following steps:
- Check Java is installed
- Download installer JAR file
- Run installer
- Check Initialization
- Post install clean-up
Details for each step are below:
Check Java is installed
Check Java is installed by running the following command:
-
java -version
Personal Services should run with Java version 7 or later
Download installer JAR file
You now need to create a directory to store the Personal Services files and download the installer and certificate into this directory. To do this run the following commands:
-
cd ~
-
mkdir PersonalServices
-
cd PersonalServices
-
wget https://download.mylinkedthings.com/PersonalServicesInstaller_Latest.jar --no-check-certificate
-
wget https://download.mylinkedthings.com/CERT_current.jks --no-check-certificate
Note: --no-check-certificate is there as I have a self signed https certificate on my server.
Run installer
Run the following command:
-
java -jar PersonalServicesInstaller_Latest.jar
Follow the prompts to preform the setup.
The default settings work for all parameters except:
- Single Node Server - Instance Action Category: Select SINGLEUSERMACHINE - This will enable you to use the Shell Action
Make sure to note down the username and password for the First Admin Web Server user. (Normally the username is webSiteUser)
Note: Having the host as localhost works, although you could provide the machines hostname here.
Check Initialization
Start the services by running the following command:
-
~/PersonalServices/svcControl.sh start
You can check the output of the server logs to see them start:
-
cat ~/PersonalServices/log/AdminWebServ.log
-
cat ~/PersonalServices/log/SingleNodeServer.log
Open a web browser and visit https://localhost:8080/app/. (Alter the port number if you installed the Admin Web Server on a different port.). Login with the First User credentials you entered in the setup process.
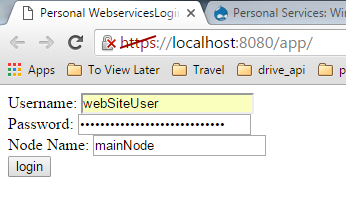
You should log in successfully and can now start configuring sockets:
TODO Pic of main screen
Post install clean-up
The setup process creates some helper files which run the setup processes for each component. These are helpful for advanced users who want to change their setup but once you are happy with the institutionalization you should delete them as accidentally running them may break the initialization.
Delete:
- SetupAdminWebserver.sh
- SetupAdminWebServKeystore.sh
- SetupConsole.sh
- SetupSingleNodeServer.sh